Updating ILO Recorder Firmware
Creator Classic in Roxio EZ CD/DVD 6
This page is to help the non-technical in properly updating their ILO DVD recorders with new available firmware.
These instructions and screenshots were created using Creator Classic in Roxio EZ CD/DVD 6 and may differ from the software you might be using. Most CD burning software, though, will work in much the same way. If, for any reason, you get stuck in the process, e-mail me here and I will do my best to try and help.
Back to main page
Visited:
times
1. Open your CD/DVD burning software and choose "Data CD"
for the type of disc you want to create.
NOTE: You can click on this picture for a larger view of this
screen.

2. In the session window, find the firmware file in the file
browser on the top half of the screen. Select it.
NOTE: You can click on this picture for a larger view of this
screen.
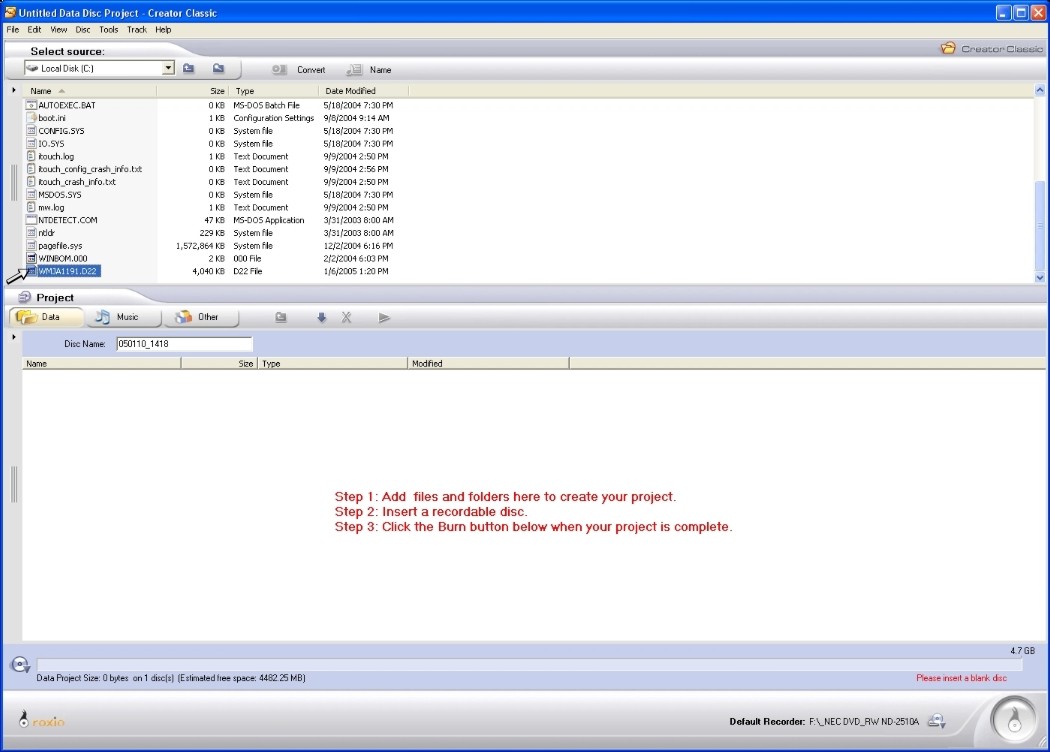
3. Drag the firmware file to the CD contents area on the
bottom half of the screen. This area is the list of files that will be burned to the
CD.
Make sure the disc name contains no spaces and is 11
characters or less (ISO9001 standard). Select "File" from the menu
bar and choose "Record Disc"
NOTE: You can click on this picture for a larger view of this
screen.

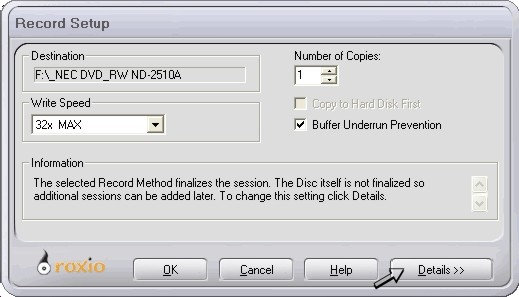
4. Click on the "Details" icon in the Record Setup screen.
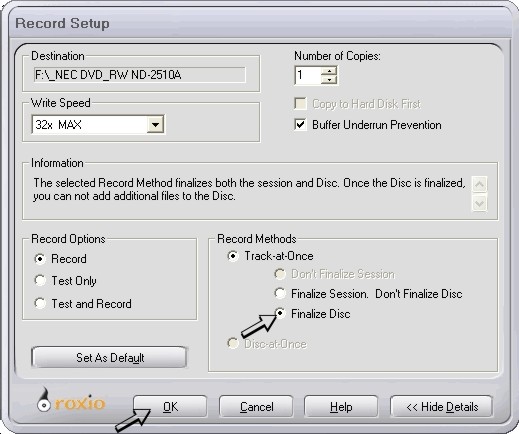
6. Make sure that "Finalize
Disc" is selected. Click the "OK" button to create the disc.
NOTE: I have had success in creating the disc without
selecting "Finalize Disc" on the HD04. If you do not want to waste an entire CD
with just a firmware file and use the disc again, try it without finalizing. If
the update does not work, you can always finalize the disc after the fact and
have wasted nothing.
Once the disc is created, place it in the drive of the ILO recorder. The recorder will read the disc and prompt you to do the update, at which point you can choose yes or no. Once the update has completed, it will prompt you to turn off the recorder and restart it.
If, for some reason, the update fails, you need not worry. When the recorder is powered back on, it will eject the drive tray and ask for a valid firmware disc. Place the disc in the drive and close it. The recorder will recognize the disc and repair itself.
Remember, when you do a firmware update, all your custom settings like VCR+ channel mapping and timer settings will be erased. You will have to reprogram these things.
Good Luck!!!